

Lambda Sensor Fitting guide
There are a number of ways to get your Lambda Sensor fitted. You may have ordered the sensor based on the information on this site, or you may have been advised by your garage or MOT station that you need a new Lambda. Your garage may have even ordered it for you on your behalf.
You may wish to fit the sensor yourself, or if you don't feel you can, get your garage to do it. It is generally a simple job and should be a low-cost job too.
Here we give you an example of a typical Lambda Sensor fitting procedure. Even if your car is not the same as this one, please read the procedure through - you may pick up some handy tips.
Be prepared for the following possible issues when fitting your own Lambda:
- The location of the sensor may be underneath the car. The two most popular locations are on the downpipe and just in front of the catalyst, in line with where the gearstick is located.
- Most newer designs with close-coupled cats such as this Astra will have the lambda in the engine compartment.
- You may need either one of two types of tools - a Lambda socket or a Spanner, depending on the location and access. Check you will be able to fit the tool and your arms in whatever space you are working in.
Step 1
Before attempting removal of your old sensor, find the sensor location on your car and check around it for access. Give some thought to which kind of tool you may get in there to remove it, and think of whether you can get in there with your arms and body to turn the tool okay. Think whether it would be best attacking the job from above the car or below it when supported in the air.
The vast majority of sensors (including this one) have an 18mm thread size. This means you will need a 22mm socket or spanner to remove them. Check the relevant datasheet for the thread size.
Some sensors are located on the downpipe itself at right angles to the floor - for that location you could use a 22mm spanner. Generally, Titania sensors have a slightly smaller body size and so a standard 80 x 22mm socket can be used, but you'll have to grind a slot down one side to allow the wiring harness to escape whilst you turn the socket. If you are fitting a Zirconia sensor then you will need to buy a deep 100 x 22mm window socket. This should be 100mm (or more) in depth. We have a recommended socket for sale here. Sensors with a 12mm thread use a 17mm socket.
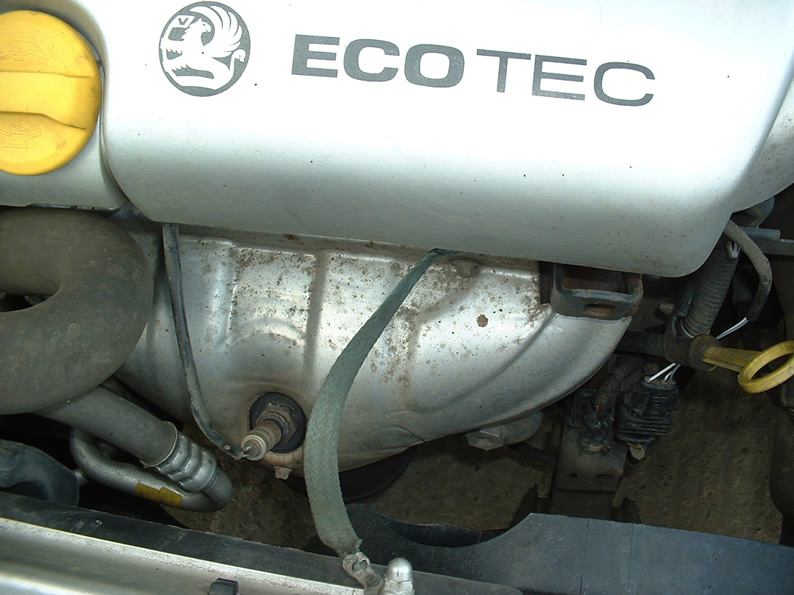
Here, the example we are using is an Ecotec engine (X16, X18, X20 GM unit fitted to Astra, Calibra, Vectra, Zafira etc.) which has the sensor fitted directly into the manifold/catalyst unit. You can see access is limited by the exhaust shield. We can choose to utilise either a standard socket or special lambda sensor removal tool, but not a spanner. The ability to use a standard socket is determined by the length of the sensor body - the one coming off the car may be too large. Bosch sensors are generally larger than NGK/NTK. This one appears to be an NGK/NTK.
Step 2
The sensor fitted is an NGK/NTK Zirconia sensor which is what we shall replace it with. Get your radio code handy and put your alarm system into 'valet mode' if it has one. Disconnect the vehicle's battery - this is especially important on vehicles with adaptive ECU mappings - the settings stored in the engine computer will have become corrupted by any faulty sensors and leaving the battery off for a couple of hours will reset the ECU to factory settings.
Some ECU systems may need resetting with a suitable scan tool.
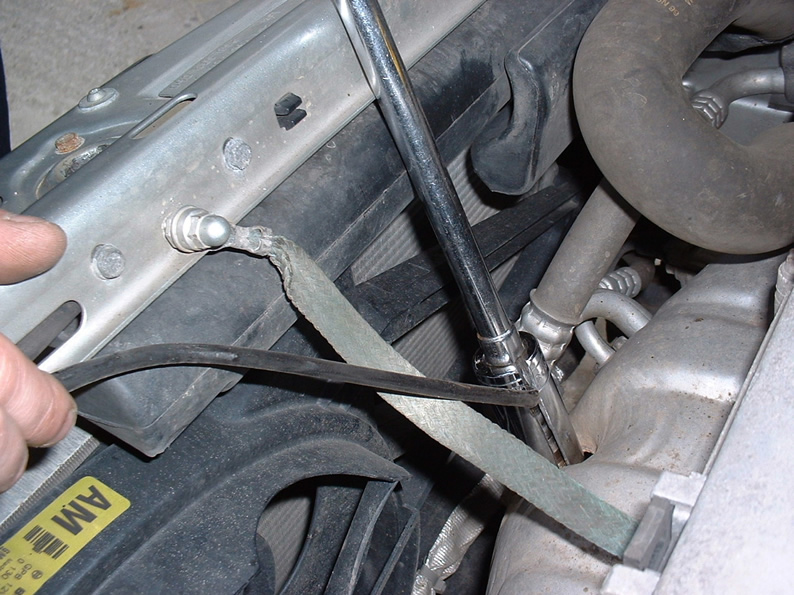
Step 3

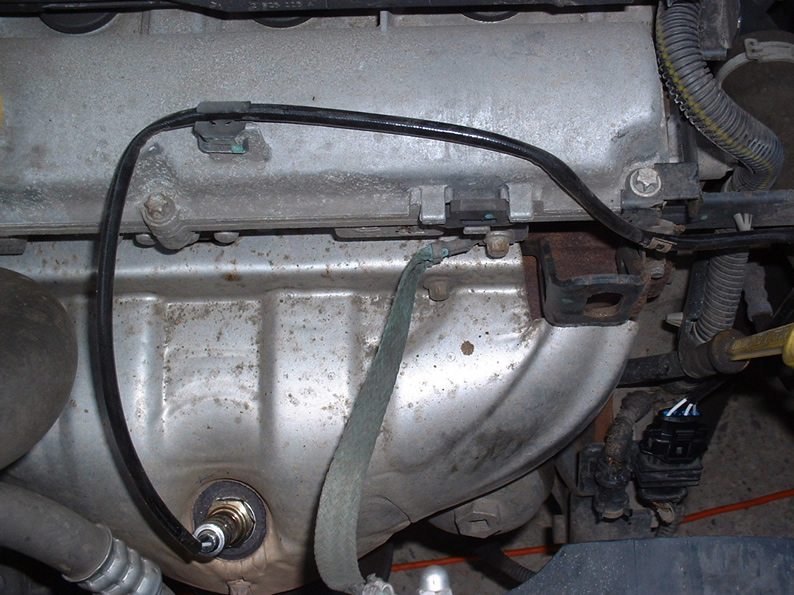
To gain access to the Lambda wiring we will have to remove the engine top cover. Remove whatever you need to gain good access to wiring clips and harnesses etc.
Step 4
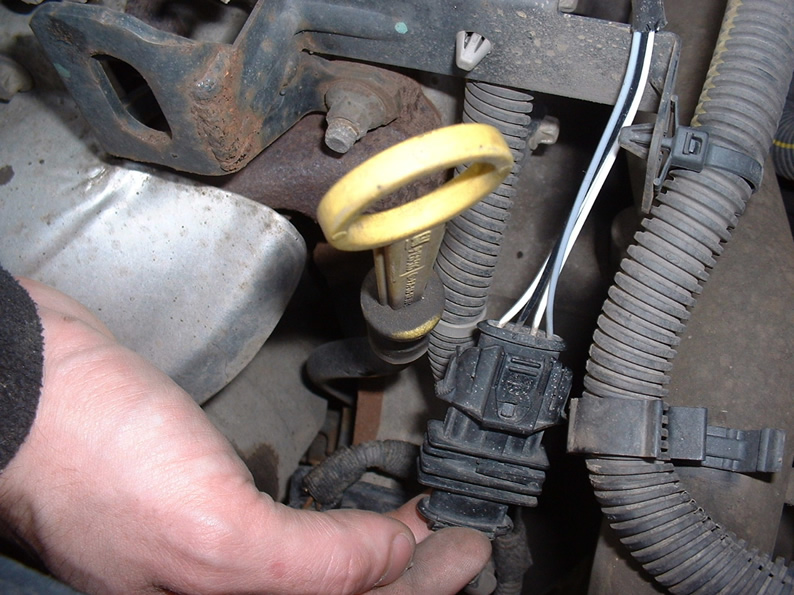
Locate the connector and remove it from it's clip. There has only been one wiring harness clip to remove on this vehicle (on the cam cover), but the longer the wiring harness the longer this job will take.
Some cars also have a long run of harness underneath the vehicle. This doesn't make the job difficult, just allow more time.
Some close-coupled cats are at the rear of the engine instead, for example
on a Zetec Ford. The harness is usually
then correspondingly shorter.
Step 5
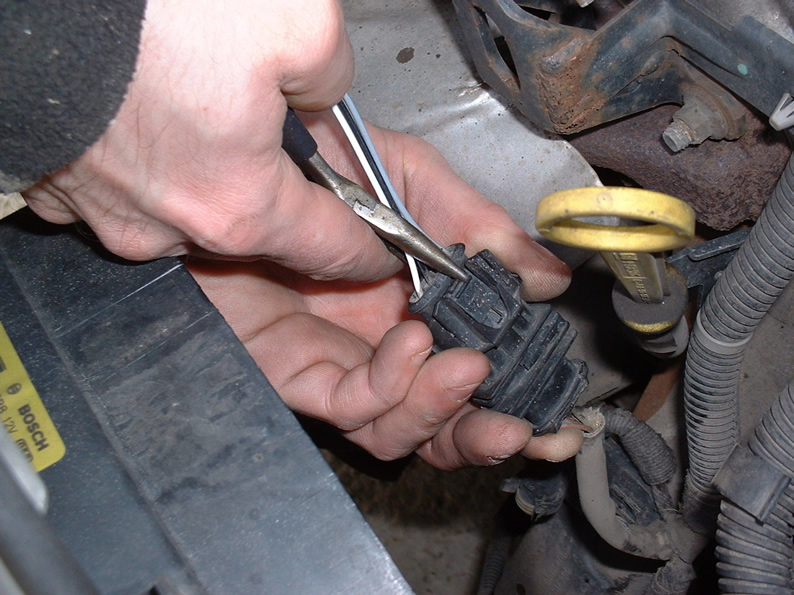
Remove the wiring connector from the vehicle harness. Pay attention to the locking clip mechanism - don't just yank it apart; use a pair of pliers or screwdriver if needed to unclip the locking mechanism.
Some locking mechanisms are more cryptic than others - this one here has a bendy tab that releases the lock. The multi-coloured AMP style connectors as fitted to French Peugeot and Citroen and Saab cars (amongst others) have a large tab that exits the connector sideways - this will release/engage the connector as part of its action but often sticks solid. Prise a small screwdriver under the coloured tab or push on the two small bits at the opposite end to get it moving.
For such a type we recommend greasing the locking tab before re-assembly so it works a bit more smoothly.
Step 6
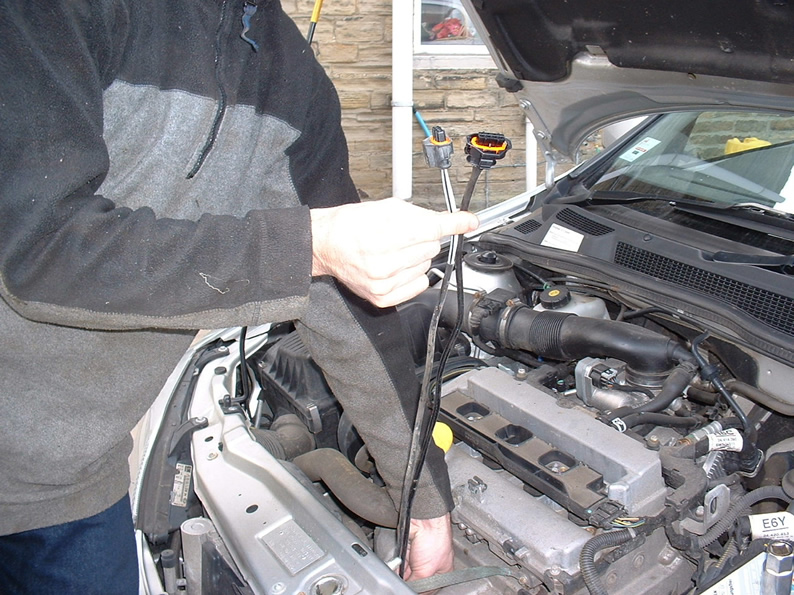
Once the wiring harness is free, and before attacking the sensor itself, check the wiring harness length against the new one. Check the connector type too, and finally check the condition of the connector on the vehicle side of the wiring harness. We like to spray WD-40 into it, then to plug in and unplug the old sensor a few times to clean it up a bit. If you like, you can then use industrial alcohol (meths, contact cleaner, brake cleaner, carb cleaner) to clean it up afterwards. Then let it dry and check the contacts are still in good condition.
Step 7
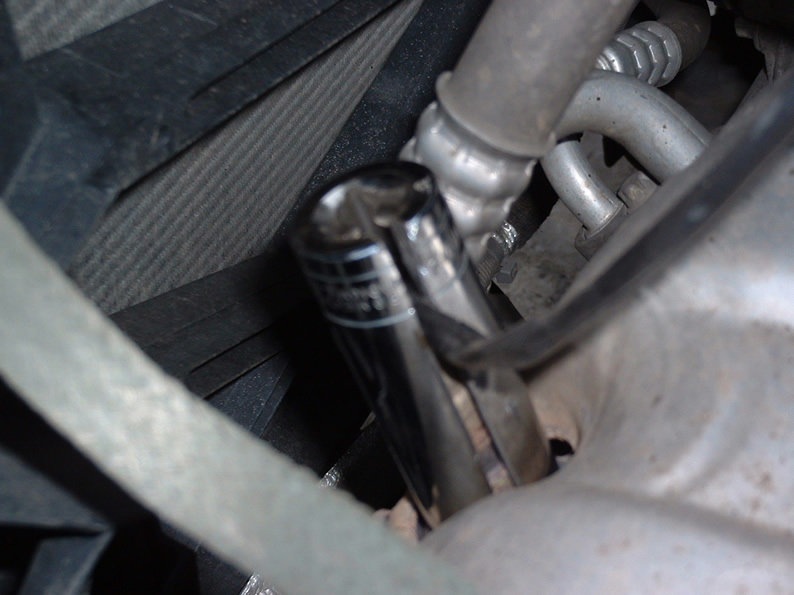
Place the removal tool on the sensor. Be prepared for some resistance when undoing the sensor - we had to use a breaker bar and extension on this car. Notice how the wiring harness fits in the slot in the side of the socket. If the sensor is difficult to remove you may use a blowtorch and penetrating fluid to shift the sensor in the same manner as any other seized fastener. Just be careful to clean the area up carefully afterwards - contaminants are not good for the new sensor. If using a blowtorch please don't melt anything. Use a small cut-out temporary metal plate to shield vulnerable areas.
Open-ended spanners are not suitable for some seized sensors so you will have to use a small amount of good judgement whilst trying to turn it. If it feels as if you are about to round the hex flats off, stop and have a re-think. Consider cutting the wiring harness off to put a ring spanner on. Consider using a combination of blowtorch and WD-40 to loosen the sensor. The blowtorch will make the sensor and manifold/downpipe expand at different rates, thus cracking apart any corrosion and letting the WD-40 seep in. Don't set fire to anything though! Sometimes hitting the outer end of the spanner with a lump hammer will help move the sensor. WD-40 is silicone free and thus sensor-safe.
Step 8

Bear in mind different manufacturer's sensors may look slightly different, for example if replacing a Bosch with an NGK or vice-versa. If the correct specification of sensor for the engine has been ordered there will be no problem. Our part for this Astra looks identical to the original, and all seems good to go.
Step 9

Remove the protective plastic cover on the thread of the new sensor and screw it into the manifold/downpipe. Remember you'll have to turn the entire harness too. Once the metal gasket contacts the sealing surface, return to using the spanner or socket. Turn the spanner until the gasket feels properly compressed (the force required to turn will suddenly become much larger) then use the guide below. Fitment is very much like fitting a spark plug. Although the sensor may have been difficult to remove, there is no need to over-tighten it on the way back in. Lambda Sensor / Oxygen Sensor torque values are as follows:
| Sensor Size | Torque Value | Fitting Guide |
| M18 x 1.5mm (22mm socket) | 35 - 45Nm | Moderate-strong force with a standard 240mm 1/2" drive wrench |
| M12 x 1.5mm (16mm socket) | 18-23 Nm | Moderate-strong force with a standard 200mm 3/8" drive wrench |
Not many people have a torque wrench capable of measuring such a low value so we have advised a general fitting guide advising how much force to use. Similar to a spark plug, you need to make sure the sealing washer (already on the new sensor) is secure. For Toyota flange-mounting types, remove as much of the old gasket as you can before putting the new gasket on. This will stop it blowing once finished. Some old gaskets with the metal ring inserts can be good for a second use. A blowing gasket can be identified by blow-by sooty deposits on the gasket. Our new types of 7A-FE sensors have a flexible copper ring sealing system applied to the sensor flange, and does away with the need for a separate gasket.
Step 10
Once the sensor is tightened, replace the wiring harness and connector into their clips. Replace any covers you may have disturbed and re-connect the battery.
Please note that your car may take a little longer to start than usual and may not idle correctly for a few seconds as the ECU re-adapts. On most vehicles, the ECU warning light if illuminated should extinguish itself within a few seconds. Also, the ECU will also need to adapt once more to your style of driving over the first few hours of operation. All done!